The Joy of Making Homemade Jam From Seasonal Fruit
Homemade jam has a way of making an ordinary morning feel special. A spoonful spread over toast, stirred into yogurt, or paired with warm biscuits can capture the flavor of summer berries, ripe peaches, or crisp autumn apples.
Making jam at home is also a rewarding way to enjoy seasonal fruit at its best. The process is simple, flexible, and surprisingly relaxing. With a few basic ingredients and some patience, you can create jars of bright, flavorful jam to enjoy now or share with friends and family.
Why Make Homemade Jam?
Store-bought jam is convenient, but homemade versions offer something different. You control the ingredients, texture, and sweetness. You can make a smooth spread, a chunky preserve, or something in between.
Homemade jam also highlights the natural character of the fruit. Strawberries create a fragrant, ruby-red spread, while peaches offer a soft, sunny flavor. Plums, blueberries, raspberries, cherries, and apples each bring their own color and taste.
Other benefits include:
– Using fruit when it is fresh and plentiful
– Preserving seasonal flavors for later
– Adjusting sweetness to suit your preference
– Creating thoughtful homemade gifts
– Reducing food waste from extra-ripe fruit
Choosing the Best Seasonal Fruit
The quality of your jam begins with the fruit. Choose produce that is ripe, fragrant, and flavorful. Slightly soft fruit is often ideal, but avoid fruit with mold, large bruised areas, or an unpleasant smell.
Different fruits have different levels of natural pectin. Pectin is a substance that helps jam thicken as it cooks. Apples, citrus, cranberries, and tart plums tend to contain more pectin. Strawberries, peaches, cherries, and very ripe berries usually contain less.
This does not mean low-pectin fruit cannot make good jam. You can combine fruits, add commercial pectin, or cook the mixture longer to reach the desired consistency.
For the best results:
- Use fruit that tastes good before cooking.
- Wash it thoroughly and remove stems, pits, cores, or tough skins as needed.
- Cut larger fruit into evenly sized pieces.
- Measure the prepared fruit before adding other ingredients.
The Basic Ingredients
Most traditional jams need only a few ingredients:
– Fresh fruit
– Sugar
– Lemon juice or another acidic ingredient
– Optional pectin
Sugar does more than add sweetness. It helps preserve the jam, improves texture, and brings out the fruit’s flavor. Lemon juice adds brightness and can help balance very sweet fruit. It may also support the setting process in recipes that rely on natural pectin.
The amount of sugar depends on the recipe and the fruit. Some fruits need more sweetness, while others taste best with a lower-sugar approach. Follow a trusted recipe when using commercial pectin, since changing the sugar or fruit quantities can affect the final texture.
Essential Equipment
You do not need a complicated collection of tools to make jam. A few reliable kitchen items are enough:
– A large, heavy-bottomed pot
– A wooden spoon or heat-resistant spatula
– Measuring cups and spoons
– A ladle
– Clean jars with lids
– A wide-mouth funnel, if available
– A plate for testing the jam’s texture
A large pot is important because fruit mixtures can foam and bubble as they cook. Choose one with plenty of extra room to help prevent spills.
Before beginning, wash your jars, lids, and tools carefully. If you plan to store jam at room temperature, use a tested canning process and follow current food safety guidance for sterilizing, filling, sealing, and processing jars.
A Simple Jam-Making Method
Start by preparing the fruit and placing it in the pot. Add the sugar and lemon juice according to your recipe. Let the mixture sit for a short time if recommended. This allows the sugar to draw out some of the fruit’s natural juices.
Place the pot over medium heat and stir until the sugar dissolves. As the fruit warms, it will release more liquid. Increase the heat as directed and bring the mixture to a steady boil.
Stir regularly, especially as the jam thickens. Scrape the bottom and sides of the pot to prevent sticking. Remove excess foam from the surface if you want a clearer, smoother appearance.
To test the consistency, place a small plate in the freezer before you begin. When the jam looks close to finished, spoon a little onto the cold plate. Let it sit briefly, then gently push it with your finger. If the surface wrinkles slightly, the jam may be ready. Remember that it will thicken more as it cools.
Avoid cooking the mixture too long. Overcooked jam can become stiff, sticky, or develop a caramelized flavor that hides the fruit.
Creating Different Textures
Texture is one of the most enjoyable parts of homemade jam. For a smooth spread, crush the fruit thoroughly or pass the cooked mixture through a fine strainer. This works well for berries with many seeds.
For a rustic jam, leave some pieces of fruit intact. Gently crushing berries with a spoon creates a spread with a pleasant, chunky texture. Peaches and plums can be cut into small pieces and cooked until tender without losing their shape completely.
You can also create a softer fruit sauce by using less cooking time. This type of preserve is delicious spooned over pancakes, ice cream, oatmeal, or baked desserts.
Flavor Ideas to Try
Once you understand the basic method, you can experiment with combinations and gentle flavor additions. Keep the changes balanced so the fruit remains the star.
Try these pairings:
– Strawberry and rhubarb
– Peach and raspberry
– Blueberry and lemon
– Plum and vanilla
– Apple and cinnamon
– Cherry and almond
– Blackberry and lime
– Apricot and ginger
Fresh herbs can also add interest. A small amount of mint, basil, rosemary, or thyme may complement certain fruits. Add delicate ingredients near the end of cooking so their flavors remain fresh.
For a brighter finish, add a little citrus zest. Orange zest works nicely with berry or stone-fruit jams, while lemon zest pairs well with apples and blueberries.
Filling and Storing Your Jam
Ladle hot jam into clean, prepared jars, leaving the amount of headspace specified by your recipe. Wipe the rims before applying the lids. If you are processing the jars for pantry storage, use a tested water-bath canning method and follow reliable instructions carefully.
For a small batch that will be refrigerated, let the jam cool as directed and store it in clean containers. Keep refrigerated and use within the time recommended by your recipe. Always check for unusual odor, mold, bubbling, or other signs of spoilage before eating.
Label each jar with the fruit and date. This small step makes it easier to enjoy your preserves while they are at their best.
Ways to Enjoy Homemade Jam
Homemade jam is useful far beyond breakfast toast. Try it in:
– Thumbprint cookies
– Layer cakes and pastries
– Grilled cheese sandwiches
– Cheese boards
– Salad dressings
– Yogurt parfaits
– Oatmeal or overnight oats
– Pancakes and waffles
– Marinades and glazes
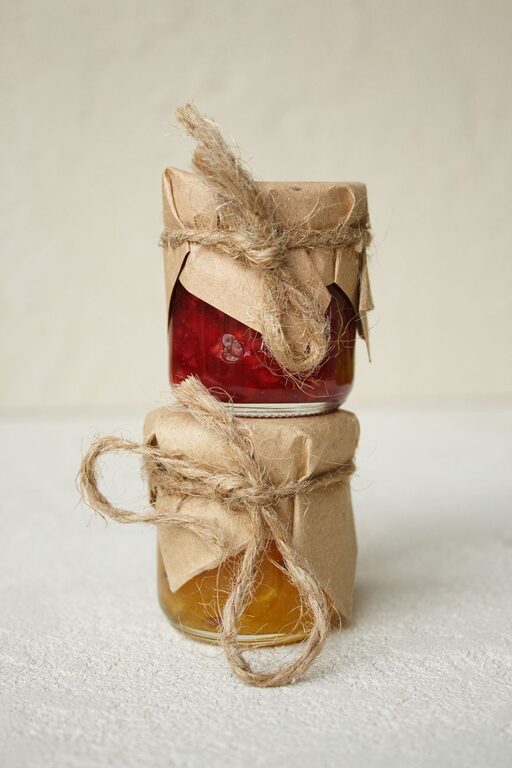
A small jar also makes a lovely gift. Add a simple label, a ribbon, and a note describing the fruit or serving ideas.
Savor the Season
Making jam is more than a way to preserve fruit. It is an opportunity to slow down, work with your hands, and enjoy the changing seasons. Each batch reflects the fruit available at that moment, whether it is a basket of midsummer berries or a bowl of autumn apples.
Start with a small batch, take notes as you cook, and do not worry if the first attempt is not perfect. With each jar, you will learn more about texture, flavor, and timing. Before long, homemade jam may become one of your favorite seasonal kitchen traditions.